k8s Cluster Setup
Create a k8s cluster with kind
Step 1: Configure the kind Cluster in file cluster-3nodes.yml.
# three node (two workers) cluster config
kind: Cluster
apiVersion: kind.x-k8s.io/v1alpha4
nodes:
- role: control-plane
- role: worker
- role: worker
Step 2: Run the following command to create the cluster:
kind create cluster --name ${cluster_name} --config kind-config.yml
Note: The creating process may take a few minutes. Please wait patiently. If you encounter any errors, please refer to the kind documentation for troubleshooting.
Install k8s Dashboard
Step 1: Deploy the k8s dashboard by running the following command:
kubectl apply -f https://raw.githubusercontent.com/kubernetes/dashboard/v2.5.0/aio/deploy/recommended.yaml
Step 2: Port forward the k8s dashboard to localhost:
kubectl port-forward -n kubernetes-dashboard svc/kubernetes-dashboard 10443:443 --address 0.0.0.0
Note: The port number can be changed to any available port number. For users who setup this cluster on a remote server, please make sure that the port is accessible.
Step 3: Access the k8s dashboard by visiting https://localhost:10443 in your browser. You will be prompted to enter a token to login like the following image. 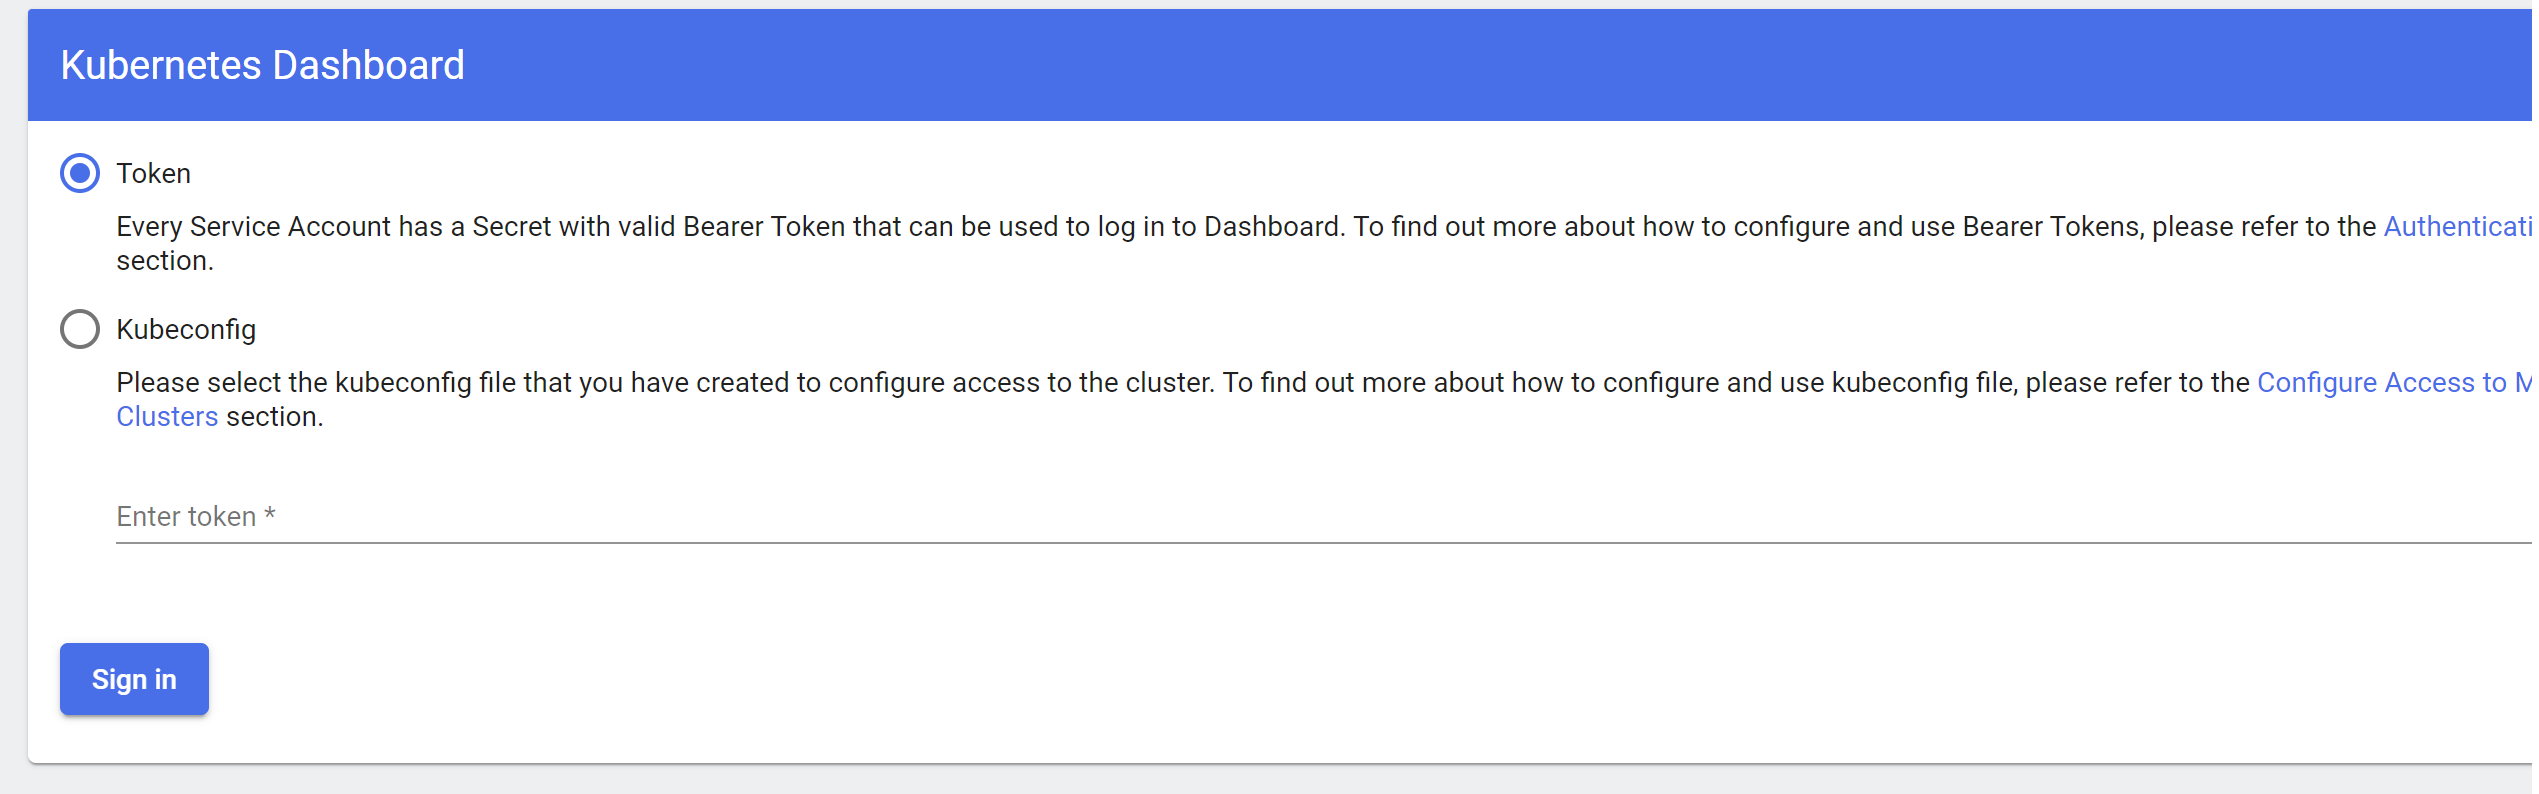
Step 4: Create service account via a yaml file dashboard-adminuser.yml:
apiVersion: v1
kind: ServiceAccount
metadata:
  name: admin-user
  namespace: kubernetes-dashboard
Run the following command to create the service account:
kubectl apply -f dashboard-adminuser.yml
Step 5: Create a cluster role binding via a yaml file adminuser-rolebinding.yml :
apiVersion: rbac.authorization.k8s.io/v1
kind: ClusterRoleBinding
metadata:
  name: admin-user
roleRef:
  apiGroup: rbac.authorization.k8s.io
  kind: ClusterRole
  name: cluster-admin
subjects:
- kind: ServiceAccount
  name: admin-user
  namespace: kubernetes-dashboard
Run the following command to create the cluster role binding:
kubectl apply -f adminuser-rolebinding.yml
Step 6: Get the token of the service account:
kubectl -n kubernetes-dashboard describe secret $(kubectl -n kubernetes-dashboard get secret | grep admin-user | awk '{print $1}')
Copy the token and paste it to the login page. You will be able to access the k8s dashboard. The following image shows the dashboard of Nodes. 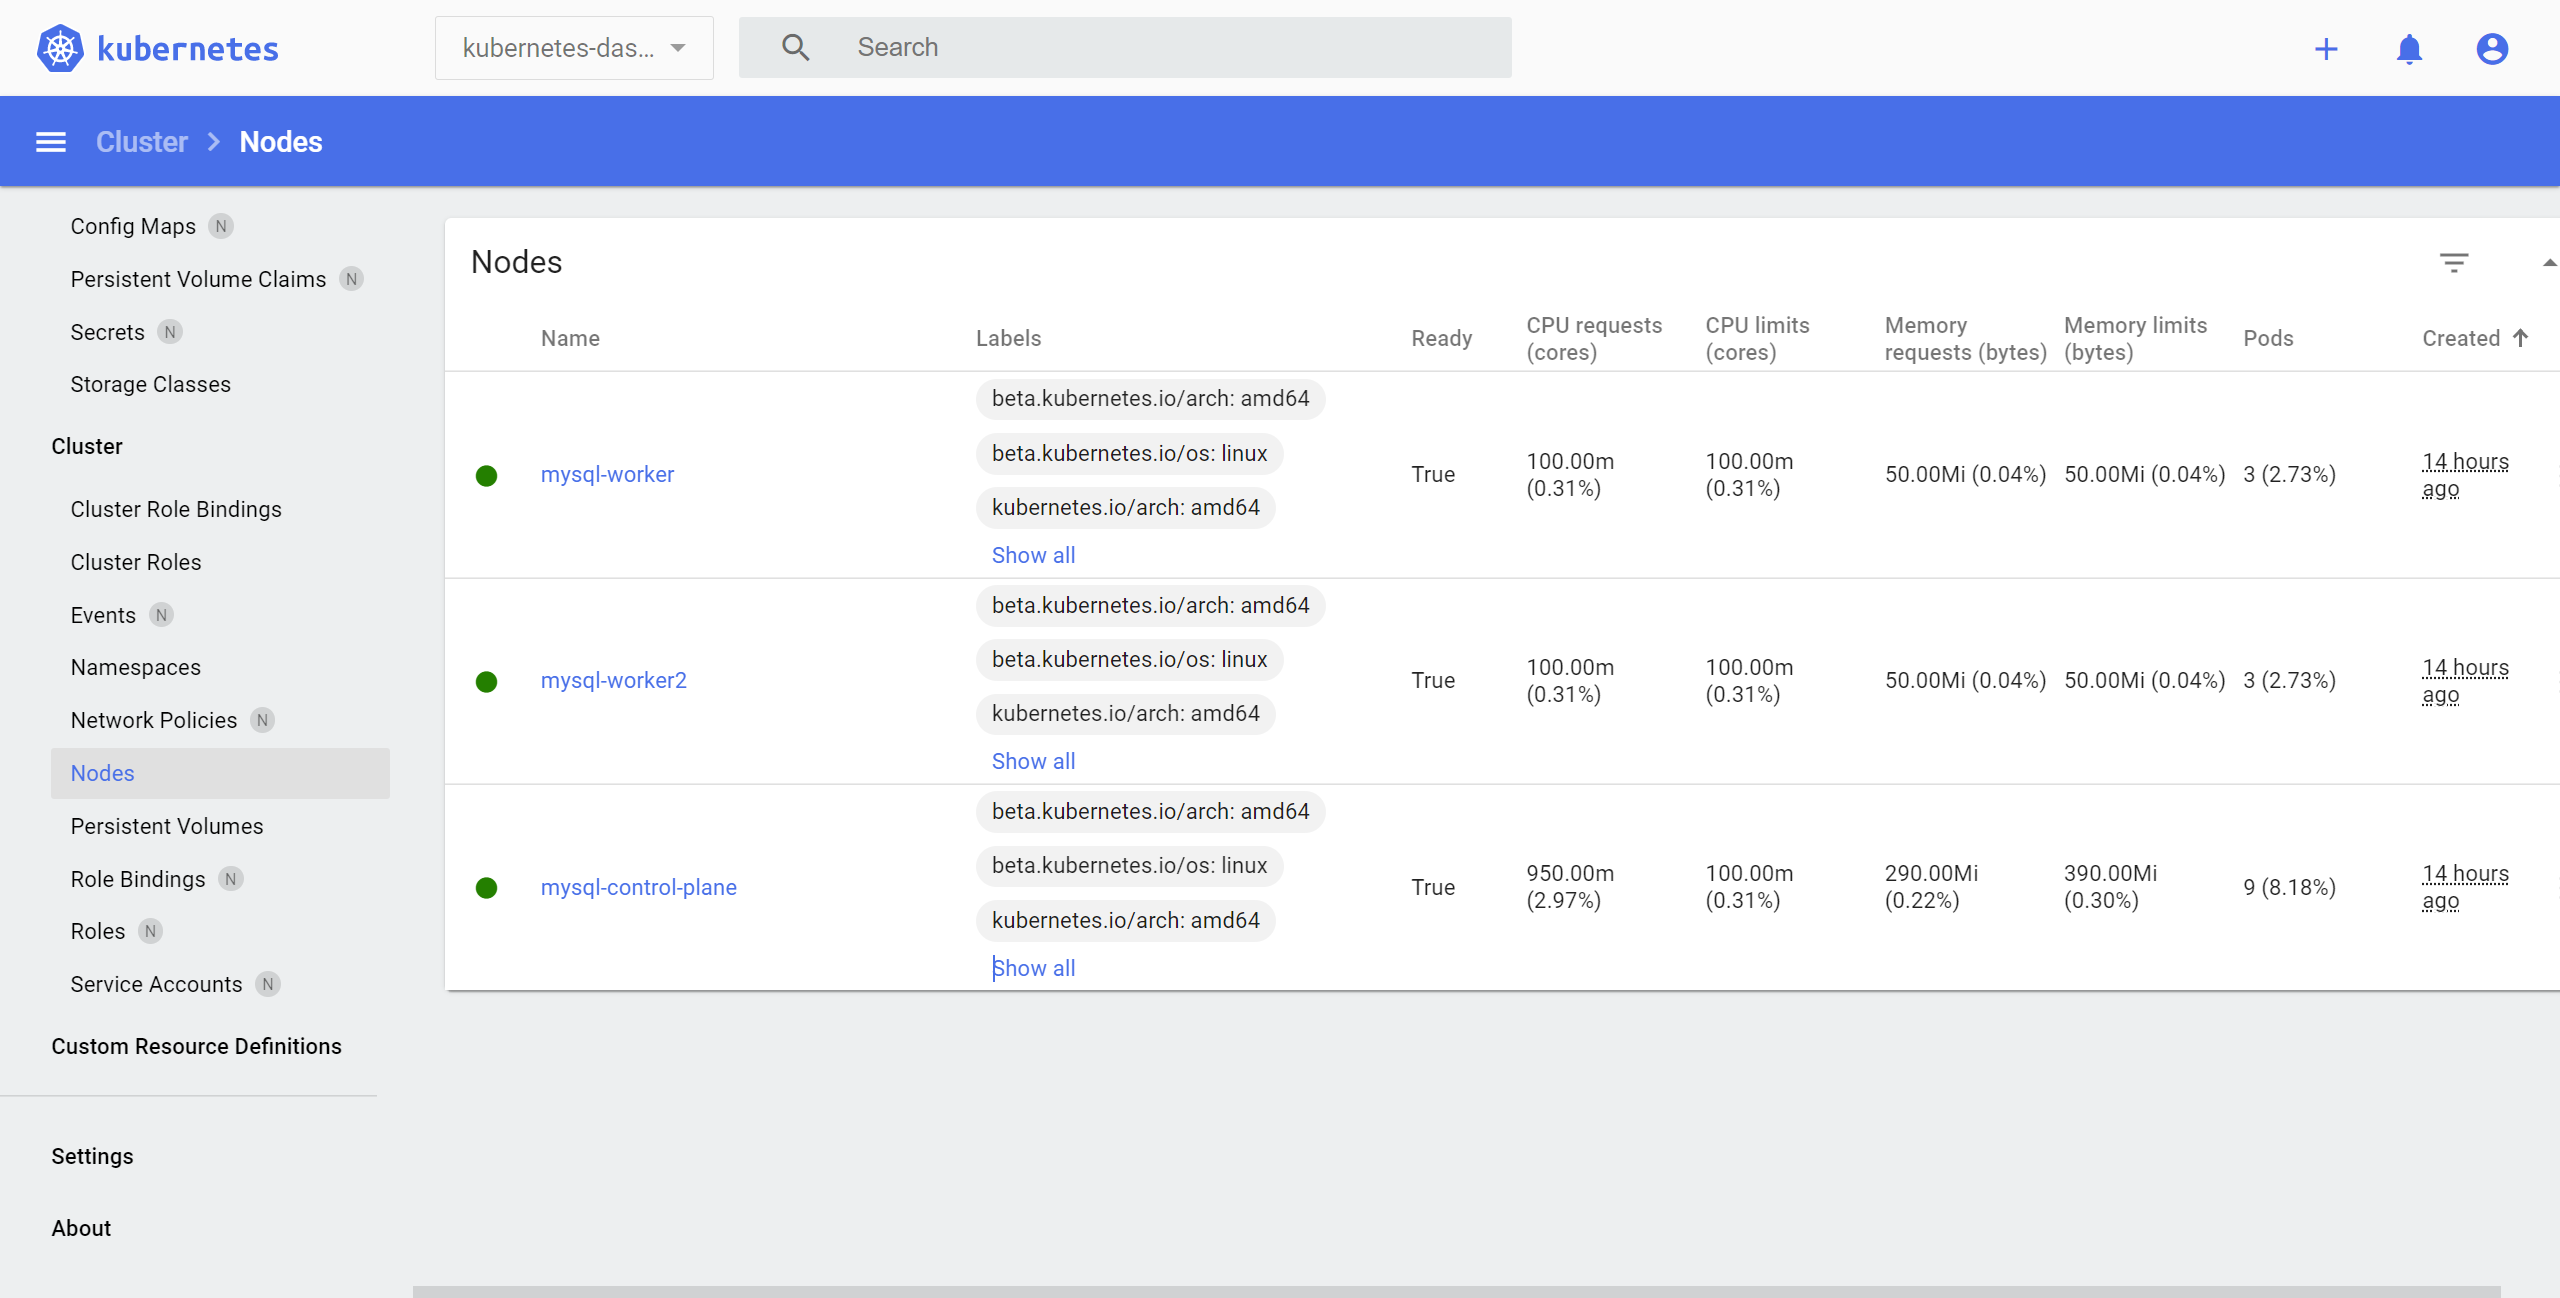
Install Chaos-Mesh
To conduct chaos engineering experiments, we use Chaos-Mesh. Chaos-Mesh is a cloud-native, powerful chaos engineering platform for kubernetes. You can also refer to the Chaos-Mesh documentation for installation.
Before installing Chaos Mesh, make sure that you have installed Helm in your environment. You can refer to the Helm documentation for installation.
Step 1: To see charts that can be installed, execute the following command:
helm search repo chaos-mesh
After the above command is completed, you can start installing Chaos Mesh.
Note: In our experiments, we use Chaos Mesh v2.1.3. If you want to use other versions, please change the version number in the following commands.
helm search repo chaos-mesh -l
Step 2: Create the namespace to install Chaos Mesh by running the following command:
kubectl create ns chaos-testing
Step 3: Install Chaos Mesh repository by running the following command:
helm install chaos-mesh chaos-mesh/chaos-mesh -n=chaos-testing --version 2.1.3
You can check the installation status in the k8s dashboard or by running the following command:
kubectl get po -n chaos-testing
Step 4: Port forward the Chaos Mesh dashboard to localhost:
kubectl port-forward -n chaos-testing svc/chaos-dashboard 2333 --address 0.0.0.0
Note: The port number can be changed to any available port number. For users who setup this cluster on a remote server, please make sure that the port is accessible.
Step 5: Access the Chaos Mesh dashboard by visiting http://localhost:2333 in your browser. You will be prompted to enter a token to login like the following image. 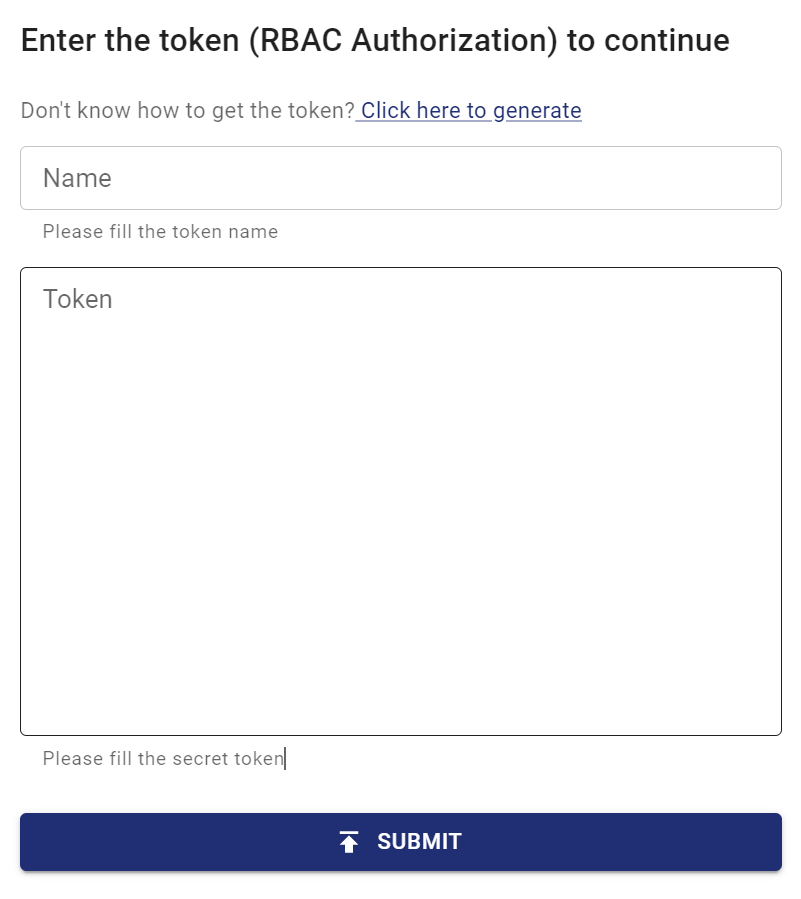
Note: Here we skip the step to create a service account and a cluster role binding. We will present the steps in website Chaos Engineering.